Short description
We have launched a new Invitations page that includes an Overview of all invitations per location and All Invitations.
Why does it matter
Admin users at caterers using the Invitations feature, are in need of getting an easy overview of the data per location in order to track progress of sign-ups/uptake. For school caterers, especially data completeness before sending out the invitations is important, so that all childres and parents can be reached.
What’s new?
Invitations is now split into two pages:
Overview : This provides admin users insights into the status of invitations per location
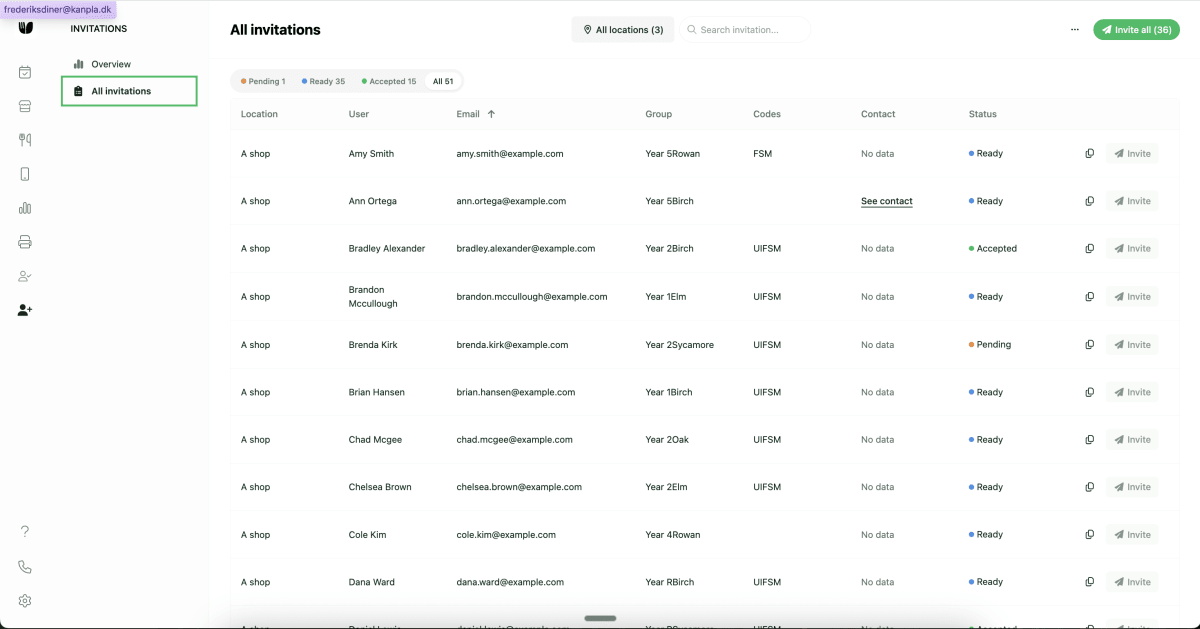
All Invitations: This provides admin users the full list of invitations and allows them to deliver invitations via email or link
Note: No functionality has been changed compared to the old page.
Note: These new pages are currently requiring a feature flag to be enabled. It is active for the following customers IFG, Cleverchefs, ABM, Glanmore and for demo purposes on Testing Kanpla.
How to use it?
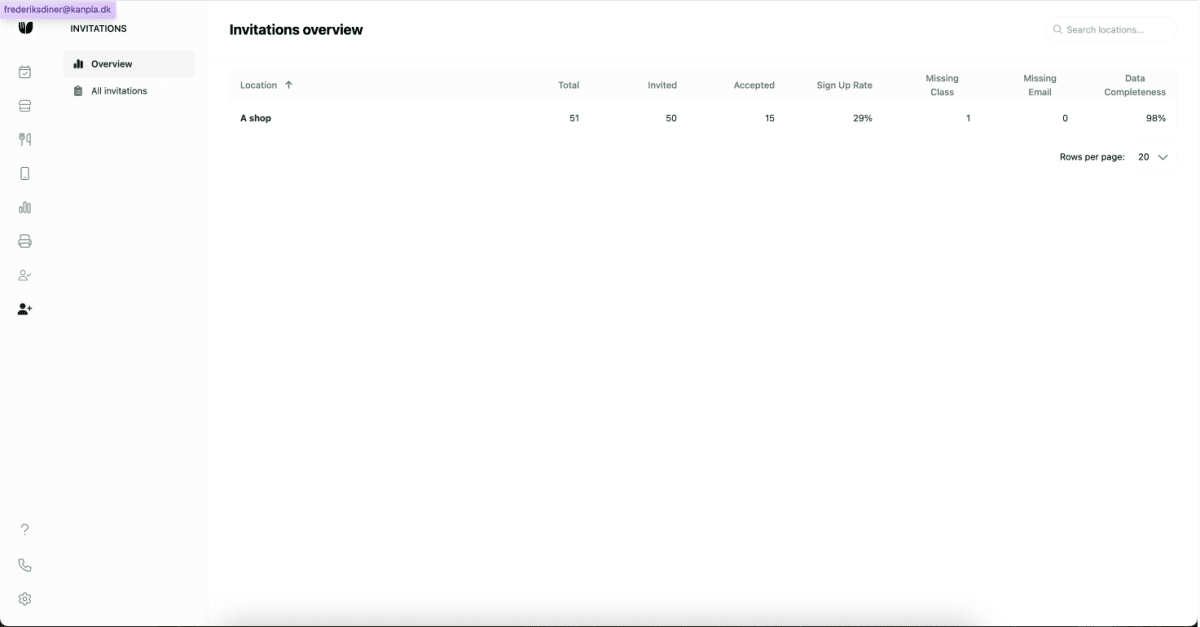
Overview
Open the navigation bar, go to Invitations > select Overview.
How to navigate and use the table
Users can sort each column by clicking the arrows next to the column label
Users can search location names
Users can change the number of rows shown in the table at the bottom of the table and navigate between pages of the table
Explanation of different columns:
Location: This is the name of the location
Total: This is the total number of invitations (i.e. children) that are imported and available at the location. Note: This number will change over time as new invitations are added
Invited: This is the total number of children that were invited; i.e. an email was sent to the email available
Accepted: This is the total number of invitations that were accepted, i.e. an actual user/child has been created for the child in invitations.
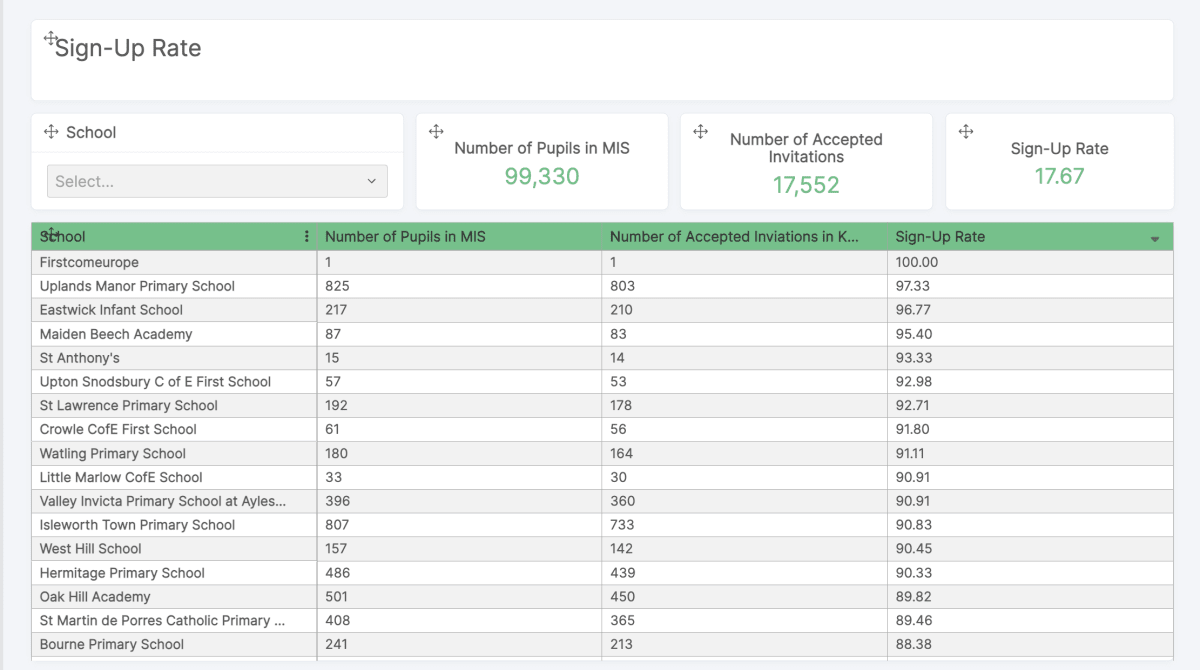
Sign Up Rate: The ratio of accepted invitations divided by the total number of invitations available at the school. Note: We currently do not have support to remove invitations when a child leaves the school
Missing Class: This indicates the number of invitations/children that are missing data for their user group/class
Missing Email: This indicated the number of invitations/children that are missing data for their email.
Data Completeness: The percentage of invitations/children out of the total where all required data is available. If a invitation/child is missing either user group/class or email this will reduce the data completeness.
All Invitations
Open the navigation bar, go to Invitations > select All Invitations.
By default admin users will see all invitations for all location in this list.
What has changed?
How to navigate and use the page
Users can filter by location using the location filter above the table
Users can search invitations by names and emails
Users can filter by invitation status by clicking Not sent, Sent, Accepted or All above the table
Users can filter the columns Group and Codes

 recently?